Raw Edit 015: Landscape photography editing tricks
In today’s episode / free Affinity Photo Tutorial I will show you from start to finish how I edited a landscape photo in non-ideal conditions and how I managed to transform an average image to an amazing landscape photo!
Hello everyone!
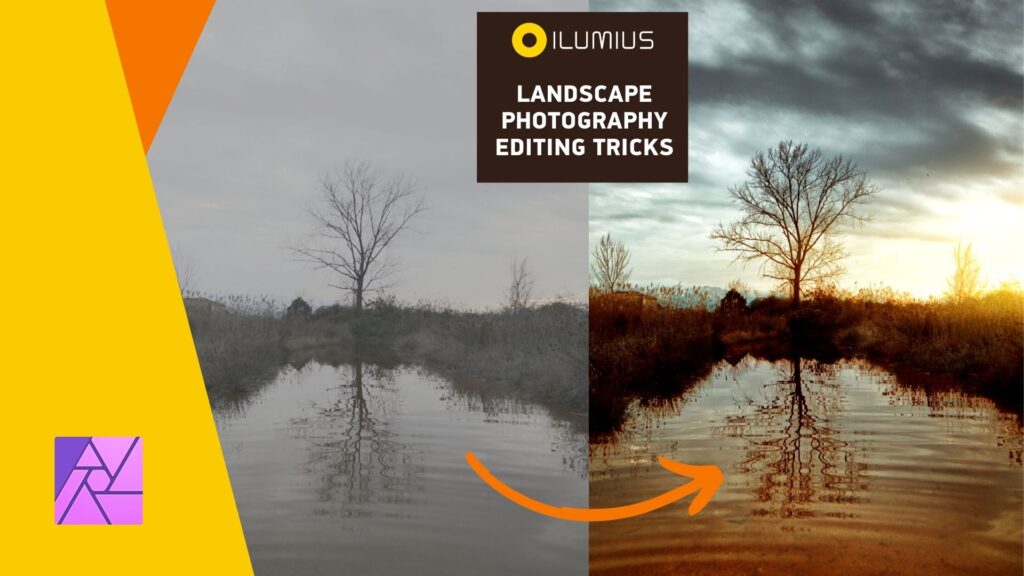
Sometimes the weather Gods do not favor us when we go out to shoot landscapes. The sky is boring the light is not what we expected, and everything seem to go sideways.
Plus with the gas prices skyrocketing ( hello inflation ? ) we have another thing to me sad about when we drive to a location and we get average results.
But Today I am going to drive your sadness away, because I will show you how I edited an average photo and transformed it into a cinematic landscape by using only Affinity Photo!
As always, I will start in the Develop persona to make some adjustments and after that I will dive into Affinity photo where I will complete the edit using adjustment layers and a few practical tricks that will take the photo to the next level.
This workflow is 100% nondestructive and you will be able to customize it to fit your very own style of shooting and editing.
Skills you will learn:
- How to prepare a flat landscape photo in the Develop persona
- How to bring more details to the surface from the highlights of your photo
- How to color grade your landscapes in order to give them a cinematic vibe and mood
- How to use various adjustment layers and make them work together in harmony
- How to relight your photo for more impact
- And many more
Enjoy!

DO YOU WANT A FREE AFFINITY PHOTO COURSE THAT WILL BLOW YOUR MIND?
If you like this tutorial you will LOVE our full FREE course on how to create cinematic black and white portraits with Affinity Photo. Grab the FULL course for free by clicking here.


Responses